Best Tools for Nginx Setup on Mac to Buy in July 2026
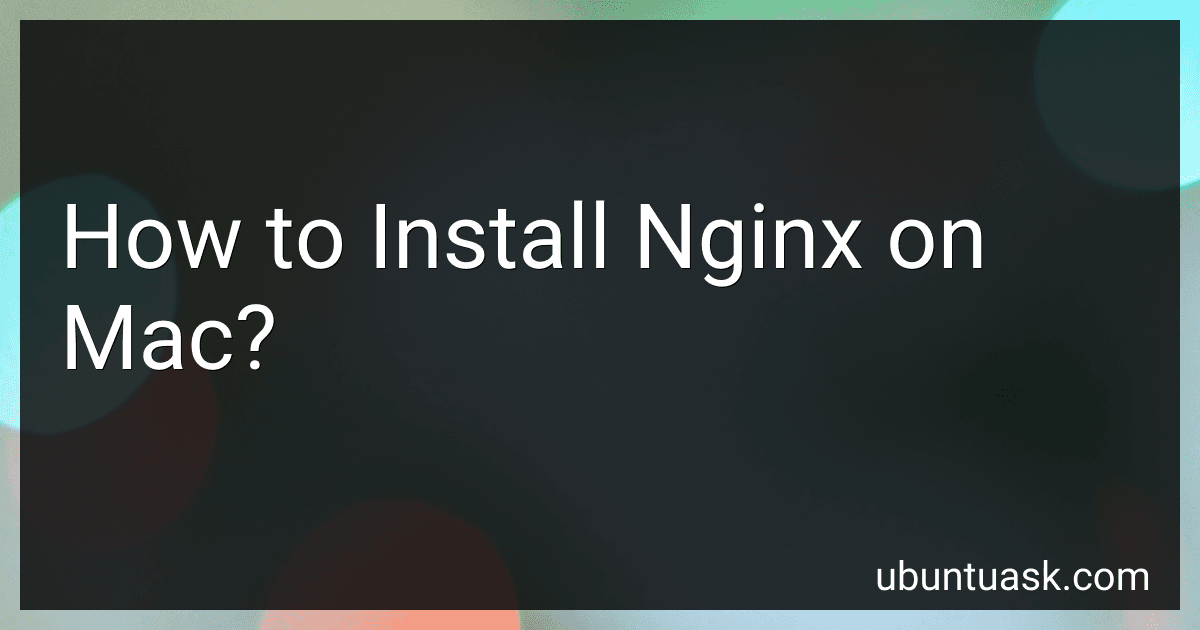
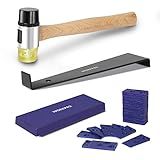
LOZAGU 43-Piece Laminate Flooring Tools, LVP installation kit, Vinyl Flooring Tools, Tapping Block with Handle, Spacers, Double-Faced Mallet and Pull Bar (43-PIECE)
-
DOUBLE-FACED MALLET WITH NON-SLIP GRIP FOR PRECISE, DAMAGE-FREE STRIKES.
-
DURABLE PULL BAR WITH SOFT PADS TO PREVENT SCRATCHING FLOORS EFFORTLESSLY.
-
ERGONOMIC TAPPING BLOCK WITH HANDLE, ENSURING EASY AND FAST INSTALLATION.


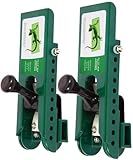
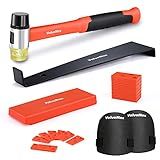
Laminate Flooring Tools, NAACOO LVP Installation Kit, Professional Vinyl Flooring Tools - Tapping Block with Handle, 10” Contour Gauge, Pull Bar, 2 in 1 Spacers, Double-Faced Mallet.
- EFFORTLESSLY INSTALL ODD-SHAPED FLOORS WITH OUR CONTOUR GAUGE.
- PROTECT YOUR HANDS AND IMPROVE CONTROL WITH OUR STURDY TAPPING BLOCK.
- ACHIEVE PRECISE GAPS WITH DURABLE, NON-SLIP 2-IN-1 SPACERS.
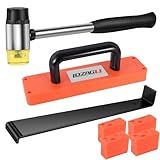
Siding Installation Tools Compatible with 3/8 inch Fiber Cement siding, Siding Tools Lap Siding Gauge with Adjustable Reveals, 2 Pack
- ONE-PERSON INSTALL: SIMPLIFIES SIDING INSTALLATION FOR EFFICIENCY.
- ADJUSTABLE GAUGES: CUSTOMIZE FOR SIDING WIDTHS 4 TO 8.25 SEAMLESSLY.
- DURABLE DESIGN: HEAVY-DUTY PLASTIC PREVENTS SCRATCHES ON SIDING.
Goldblatt Laminate Wood Flooring Tools Installation Kit with 100 Spacers, Reinforced Double-Faced Mallet, Tapping Block, Heavy Duty Pull Bar, and Protective Knee Pads
-
DURABLE CAST IRON MALLET: TOUGH, LIGHTWEIGHT DESIGN FOR EASY USE.
-
PREMIUM STEEL PULL BAR: PROTECTS FLOORING WITH SUPERIOR STRENGTH & CORROSION RESISTANCE.
-
COMPLETE INSTALLATION KIT: EVERYTHING YOU NEED FOR A HASSLE-FREE SETUP!
WORKPRO Laminate Wood Flooring Installation Kit with Reinforced Double-Faced Mallet, Heavy Duty Pull Bar, Tapping Block and 30-Piece Spacers Included,Multicolor
- HEAVY-DUTY MALLET ENSURES A SOFT YET POWERFUL STRIKE FOR PRECISION.
- ENHANCED PULL BAR PROTECTS FLOORS WHILE PROVIDING SUPERIOR STRENGTH.
- DURABLE TAPPING BLOCK AND SPACERS INCLUDED FOR PROFESSIONAL RESULTS.
ValueMax Laminate Wood Flooring Installation Kit with Solid Tapping Block, Wider Heavy Duty Pull Bar, Reinforced Double-Faced Mallet with Non-Slip Soft Grip, Foam Kneepads, 30-Piece Spacers
- COMPLETE KIT FOR EASY, PROFESSIONAL-GRADE FLOORING INSTALLATION.
- DURABLE MALLET AND PULL BAR ENSURE PRECISE, DAMAGE-FREE RESULTS.
- COMFORT-FOCUSED KNEE PADS AND SPACERS ENHANCE YOUR INSTALLATION EXPERIENCE.
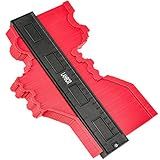
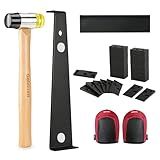
Contour Gauge 10 Inch, Widen Plastic Profile Gauge Duplicator, Precisely Copy Irregular Shapes Wood Template Measuring Tool for Perfect Fit and Easy Cutting (10 Inch Widen-Red)
- EFFORTLESSLY DUPLICATE SHAPES, SAVING TIME FOR CARPENTERS!
- HIGH-QUALITY ABS ENSURES DURABILITY AND PRECISE MEASUREMENTS.
- VERSATILE FOR TILES, PIPES, AND VARIOUS MODELING APPLICATIONS.
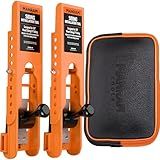
Siding Installation Tools with Storage Pouch, Mounting Kit for 3/8-Inch Fiber Cement Sidings, Lap Siding Gauge with Adjustable Reveals, Durable Polycarbonate Body, 2 Pack
- ACHIEVE PROFESSIONAL RESULTS WITH ACCURATE SPACING FOR SIDING PANELS.
- CUSTOMIZE YOUR INSTALLATION WITH ADJUSTABLE SETTINGS FROM 4 TO 8 INCHES.
- DURABLE DESIGN ENSURES LONGEVITY, PERFECT FOR CONTRACTORS AND DIYERS.
To install Nginx on Mac, you can follow these steps:
- Open the Terminal on your Mac. You can find it under Applications → Utilities → Terminal.
- Install Homebrew, a package manager for macOS, by running the following command in the Terminal:
/usr/bin/ruby -e "$(curl -fsSL https://raw.githubusercontent.com/Homebrew/install/master/install)"
- Once Homebrew is successfully installed, use the following command to update it:
brew update
- Now, you can install Nginx by running the following command:
brew install nginx
- After the installation is complete, you can start Nginx by running the command:
sudo nginx
You may be prompted to enter your password.
- To verify if Nginx is properly running, open a web browser and visit http://localhost. If Nginx is installed correctly, you will see a "Welcome to Nginx!" message.
- By default, Nginx is set to start automatically on system boot. You can stop it using the following command:
sudo nginx -s stop
- If you wish to uninstall Nginx, use the following command:
brew uninstall nginx
Remember to adjust your server configurations in the /usr/local/etc/nginx/ directory to suit your needs.
Can I automate Nginx deployments or configurations on Mac?
Yes, you can automate Nginx deployments or configurations on a Mac using various automation tools and techniques. Here are a few options:
- Shell Scripting: You can create shell scripts using bash or other shell scripting languages to automate the deployment and configuration of Nginx. Shell scripts can be executed manually or scheduled using cron jobs.
- Configuration Management Tools: Tools like Ansible, Puppet, or Chef can be used to automate Nginx deployments and configurations on Mac. These tools allow you to define the desired state of the Nginx configuration and automate the deployment process.
- Docker: Using Docker, you can create containers with pre-configured Nginx setups and deploy them on Mac. Docker provides a way to package an application and its dependencies into a single container, making it easier to automate and deploy Nginx.
- Package Managers: On Mac, package managers like Homebrew or MacPorts can be used to automate the installation and management of Nginx. These package managers simplify the process by handling dependencies and updating Nginx when necessary.
Remember to consider the security implications and follow best practices when automating deployments and configurations, such as keeping sensitive information like passwords and certificates secure.
How do I check the current version of Mac OS on my device?
To check the current version of Mac OS on your device, follow these steps:
- Click on the Apple menu () in the top-left corner of the screen.
- Select "About This Mac" from the drop-down menu.
- A window will appear displaying your Mac's current OS version.
The version number will be mentioned below "macOS" or "OS X", depending on the version you are running. It will be written as something like "macOS Big Sur 11.2.1" or "OS X El Capitan 10.11.6".
How do I enable SSL/TLS encryption for my Nginx server on Mac?
To enable SSL/TLS encryption for your Nginx server on Mac, you will need to follow these steps:
- Generate a private key and a certificate signing request (CSR). You can use the OpenSSL tool to do this. Open Terminal and run the following command to generate a private key: openssl genrsa -out yourdomain.com.key 2048 Then, generate a CSR with the following command: openssl req -new -key yourdomain.com.key -out yourdomain.com.csr Make sure to replace yourdomain.com with your actual domain name.
- Submit the CSR to a certificate authority (CA) to obtain an SSL/TLS certificate. You can choose a trusted CA, such as Let's Encrypt, RapidSSL, or VeriSign.
- Once you receive the certificate files from the CA, copy them to your server. For example, you can place the certificate file (yourdomain.com.crt) in the /etc/nginx/ssl directory.
- Open the Nginx configuration file for your server. It is commonly located at /etc/nginx/nginx.conf or /etc/nginx/conf.d/default.conf.
- Inside the server block, add the following lines to configure SSL/TLS: server { listen 443 ssl; server_name yourdomain.com; ssl_certificate /etc/nginx/ssl/yourdomain.com.crt; ssl_certificate_key /etc/nginx/ssl/yourdomain.com.key; # Any additional SSL/TLS configuration options } Replace yourdomain.com with your actual domain name and adjust the paths to the certificate files as necessary.
- Save the configuration file and exit the editor.
- Verify the syntax of the Nginx configuration files by running the following command: nginx -t If the syntax is correct, you should see nginx: configuration file /etc/nginx/nginx.conf test is successful.' Otherwise, review the error messages and fix the configuration file accordingly.
- Restart the Nginx server to apply the changes: sudo service nginx restart Alternatively, you can use brew services restart nginx if you have installed Nginx with Homebrew.
After completing these steps, your Nginx server should be configured to use SSL/TLS encryption. You can now access your website securely using https://yourdomain.com.
Is Nginx free to use?
Yes, Nginx is free to use. It is released under the 2-clause BSD-like license, which allows anyone to use, modify, and distribute the software without any cost. Nginx also offers commercial support and enterprise features through its Nginx Plus product, which requires a paid subscription.
Are there any prerequisites for installing Nginx on Mac?
To install Nginx on a Mac, you need to have the following prerequisites:
- Operating System: macOS (Mac OS X)
- Xcode Command Line Tools: Install Xcode, open it, and go to Preferences > Locations > Command Line Tools to install the command line tools.
Once you have these prerequisites, you can proceed with the installation process of Nginx on your Mac.
Are there any known vulnerabilities or issues with Nginx on Mac?
There are no specific vulnerabilities or issues with Nginx on Mac itself. However, like any software, Nginx may have security vulnerabilities or configuration issues that could potentially be exploited on any platform. It is important to keep your Nginx installation up to date with the latest security patches and follow best practices for secure configuration. Regularly monitoring the Nginx security advisories and security-related forums can help you stay informed about any potential vulnerabilities.
How can I test if Nginx is running correctly on my Mac?
There are a few ways to test if Nginx is running correctly on your Mac:
- Check the Nginx Status: Open a web browser and enter the address "http://localhost:8080" or "http://127.0.0.1:8080". If Nginx is running correctly, you should see the default Nginx welcome page.
- Use Terminal: Open Terminal and run the following command: "sudo nginx -t". This will test the Nginx configuration for any syntax errors. If the configuration is correct, it will display "nginx: configuration file /etc/nginx/nginx.conf test is successful". If there are any errors, it will show you the specific error that needs to be fixed.
- Check the Nginx Process: Open Terminal and run the command: "ps aux | grep nginx". This will display a list of running processes that contain "nginx". If you see multiple processes related to Nginx, it indicates that Nginx is running correctly.
- Test the Nginx Service: Open Terminal and run the command: "sudo nginx". If Nginx is already running, it will display a message like "nginx: [warn] nginx is already running". If Nginx was not running before, it will start the Nginx service.
By using these methods, you can determine if Nginx is running correctly on your Mac.