
Best Tensor Attribute Storage Solutions to Buy in July 2026
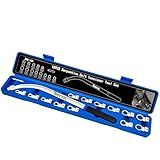
15PCS Universal Auxiliary Idler Belt Tensioner Pulley Removal Tool Kit, 12-Point 12-19mm (0.47"-0.74") Serpentine Belt Tension Pulley Wrench Set, Engine Timing Belt Tensioning Nut Bolt Screw Remover
-
ACCESS TIGHT SPOTS EASILY FOR QUICK AUTOMOTIVE REPAIRS AND UPGRADES.
-
VERSATILE TOOL KIT WITH ADAPTERS FOR ALMOST ALL CAR MODELS INCLUDED.
-
DURABLE, HIGH-QUALITY MATERIALS ENSURE LONG-LASTING PERFORMANCE AND VALUE.


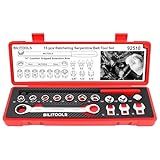
BILITOOLS 15-Piece Universal Serpentine Belt Tool Set, Ratcheting Serpentine Belt Tensioner Tool Kit
- VERSATILE TOOL SET: EVERYTHING NEEDED FOR SERPENTINE BELT WORK INCLUDED.
- RATCHETING EFFICIENCY: COMBINES WRENCH AND REMOVAL TOOL FOR EASY USE.
- REACH WITH EASE: EXTENSION ARM AND LOW-PROFILE SOCKETS NAVIGATE TIGHT SPOTS.

DAYDOOR Camshaft Crankshaft Engine Timing Tool Kit with Storage Case Compatible with Audi VW VAG 2006-2018 EA888 1.8 2.0 TSI TFSI T10355 T10060A T10352 T10368 T40011 T40196 T40268-25 PCS
-
PRECISION TIMING TOOL KIT FOR EA888 ENGINES BOOSTS REPAIR EFFICIENCY
-
DURABLE, PREMIUM STEEL DESIGN ENSURES LONG-LASTING PERFORMANCE
-
COMPLETE 25-PIECE SET FOR ALL YOUR TIMING REPAIR NEEDS & COMPATIBILITY
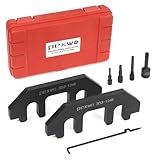
pexwo 303-1248 Camshaft Holding Tool -Timing Tool Kit- for Ford 3.5L & 3.7L 4V Engines - Includes Chain Tensioner Tool, 3 Crank Pin Alignment Set for Blocking The Crankshaft - Portable Storage Case
-
SIMPLIFIES TIMING CHAIN REPAIRS ON FORD ENGINES, SAVING TIME AND COST.
-
ENGINEERED FOR PERFECT FIT ON 2010-2020 FORD/LINCOLN MODELS.
-
DURABLE, RUST-RESISTANT TOOLS IN A SECURE, PORTABLE HARD CASE.

3pcs Zip Tie Organizer, Lightweight Plastic Cable Organizer Electrical Tape Holder Reusable Cable Tie Tightener Storage Wire Management Keeper Accessories Tool (Tie Not Included)
- LIGHTWEIGHT DESIGN ENSURES EASY HANDLING AND SAFE HIGH-ALTITUDE WORK.
- AUTOMATIC BUNDLING FEATURE SAVES TIME; NO MORE MANUAL TIGHTENING!
- DURABLE PLASTIC CONSTRUCTION ENSURES LONG-LASTING, RELIABLE CABLE STORAGE.
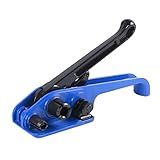
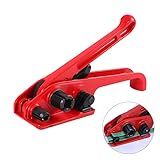
Heavy Duty Poly Strapping Tensioner & Cutter Manual Banding Tools Windlass for 1/2" -3/4" Width Polyester Polyproplyn Strap (Blue)
- DURABLE DESIGN: HEAVY-DUTY ALUMINUM & STEEL FOR LONG-LASTING USE.
- USER-FRIENDLY: LIGHTWEIGHT TOOL FOR EASY VERTICAL & HORIZONTAL USE.
- VERSATILE FUNCTIONALITY: PERFECT FOR HOME OR INDUSTRIAL STRAPPING NEEDS.
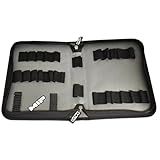
MIP 5210 RC Tool Bag 40 Pocket – Holds Hex & Nut Drivers and 1/4 Drive Bits, Precision Tools for RC Car Repair, RC Cars, Quadcopter, Helicopter, FPV Racing Drones
- EFFORTLESS ORGANIZATION: 40 ELASTIC STRAPS KEEP ALL YOUR TOOLS SECURE!
- BUILT TO LAST: HIGH-QUALITY MATERIALS FOR ENDURING DAILY USE.
- COMPACT & PORTABLE: EASY TO CARRY, MAXIMIZES STORAGE WITHOUT BULK!
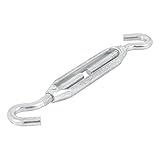
Tensor zinc, 5/16, hook-hook
Heavy Duty Poly Strapping Tensioner & Cutter Manual Banding Tools Windlass for 1/2" -3/4" Width Polyester Polyproplyn Strap (Red)
- DURABLE DESIGN: HEAVY-DUTY ALUMINUM & STEEL FOR LONG-LASTING USE.
- USER-FRIENDLY: EASY OPERATION WITHOUT SPECIAL SKILLS FOR EFFICIENCY.
- VERSATILE USES: PERFECT FOR HOME, WAREHOUSE, & CARGO SECURING NEEDS.
To save Python tensor attributes to disk, you can follow these steps:
- Import the necessary libraries: import torch import h5py
- Create a tensor with some data: tensor_data = torch.tensor([1, 2, 3, 4, 5])
- Create a dictionary to store the tensor attributes: tensor_attributes = { 'data': tensor_data.data, 'dtype': tensor_data.dtype, 'requires_grad': tensor_data.requires_grad, 'device': str(tensor_data.device) }
- Specify the file path where you want to save the attributes: file_path = 'path/to/save/attributes.h5'
- Open the file in write mode using h5py: with h5py.File(file_path, 'w') as file: ```
- Iterate over the tensor attributes and save them to the file: for attr_name, attr_value in tensor_attributes.items(): file.create_dataset(attr_name, data=attr_value)
- Close the file: file.close()
By following these steps, you can save Python tensor attributes to disk using the h5py library. Remember to replace 'path/to/save/attributes.h5' with the actual file path you want to use for saving the attributes.
What is the recommended way to save tensor attributes to multiple files in Python?
The recommended way to save tensor attributes to multiple files in Python is to use the torch.save() function provided by the PyTorch library.
Here's an example of how you can save tensor attributes to multiple files:
import torch
Create your tensors
tensor1 = torch.tensor([1, 2, 3]) tensor2 = torch.tensor([4, 5, 6]) tensor3 = torch.tensor([7, 8, 9])
Save each tensor to a separate file
torch.save(tensor1, 'tensor1.pt') torch.save(tensor2, 'tensor2.pt') torch.save(tensor3, 'tensor3.pt')
In this example, torch.save() is used to save each tensor to a separate file. The first argument passed to torch.save() is the tensor to be saved, and the second argument is the file path where the tensor will be saved.
After running this code, three separate files named tensor1.pt, tensor2.pt, and tensor3.pt will be created, each containing the respective tensor.
You can later load these tensors from their respective files using the torch.load() function:
loaded_tensor1 = torch.load('tensor1.pt') loaded_tensor2 = torch.load('tensor2.pt') loaded_tensor3 = torch.load('tensor3.pt')
The torch.load() function loads the tensor from the specified file path. After executing this code, loaded_tensor1, loaded_tensor2, and loaded_tensor3 will contain the respective tensors that were previously saved.
What is the process to save tensor attributes to a Parquet file in Python?
To save tensor attributes to a Parquet file in Python, you can follow these steps:
- Install the necessary libraries: You will need to install the pyarrow library, which provides support for reading and writing Parquet files in Python.
pip install pyarrow
- Import the required libraries:
import pyarrow as pa import pyarrow.parquet as pq
- Convert the tensor to a NumPy array: If your tensor is in a format other than NumPy, you will need to convert it to a NumPy array first. You can use the .numpy() method of the tensor to obtain a NumPy array representation.
- Create a PyArrow table with the tensor attributes:
data = {'attribute_name': tensor} table = pa.Table.from_pandas(data)
Here, attribute_name is the name you want to give to the attribute, and tensor is the NumPy array representation of your tensor.
- Define the Parquet file name and schema:
filename = 'path/to/your/file.parquet' schema = table.schema
- Write the table to a Parquet file with the desired attributes:
with pq.ParquetWriter(filename, schema) as writer: writer.write_table(table)
This will save the table to a Parquet file named filename with the specified schema.
That's it! You have now saved the tensor attributes to a Parquet file in Python using PyArrow.
How to save tensor attributes to disk with customizable file naming conventions in Python?
To save tensor attributes to disk with customizable file naming conventions in Python, you can follow the steps below:
- Import the necessary libraries:
import torch import os
- Define a function to save the tensor attributes:
def save_tensor_attributes(tensor, save_dir, filename_prefix, attributes): # Create the directory if it does not exist os.makedirs(save_dir, exist_ok=True)
# Generate the complete filename with attributes
filename = filename\_prefix + '\_' + '\_'.join(\[str(getattr(tensor, attr)) for attr in attributes\])

# Save the tensor attributes to disk
torch.save(tensor, os.path.join(save\_dir, filename))
- Call the function with the appropriate arguments:
# Example usage tensor = torch.randn(3, 4) save_dir = 'path/to/save_dir' filename_prefix = 'tensor_data' attributes = ['size', 'dtype']
save_tensor_attributes(tensor, save_dir, filename_prefix, attributes)
In this example, the tensor size and data type attributes will be used in the filename. The saved tensor will be stored in the specified directory with a filename like tensor_data_3_4_float32.pt (assuming the tensor size is (3, 4) and dtype is float32).
Note: You can modify the attributes list in the save_tensor_attributes function according to the specific tensor attributes you want to include in the filename.
How to save tensor attributes as a JSON file in Python?
To save tensor attributes as a JSON file in Python, you can follow these steps:
- Import the necessary libraries:
import json import torch
- Create a tensor and define its attributes:
tensor = torch.tensor([[1.0, 2.0], [3.0, 4.0]]) tensor.requires_grad = True tensor.grad = torch.ones_like(tensor)
- Define a function to convert the tensor attributes to a dictionary:
def tensor_to_dict(tensor): return { 'data': tensor.data.tolist(), 'requires_grad': tensor.requires_grad, 'grad': tensor.grad.tolist() if tensor.grad is not None else None }
- Convert the tensor attributes to a dictionary:
tensor_dict = tensor_to_dict(tensor)
- Save the dictionary as a JSON file:
with open('tensor_attributes.json', 'w') as outfile: json.dump(tensor_dict, outfile)
Now, you have successfully saved the tensor attributes as a JSON file named 'tensor_attributes.json'.
What is the best format to save tensor attributes for future use in Python?
In Python, the best format to save tensor attributes for future use depends on the specific use case and requirements. Here are some commonly used formats:
- Numpy's .npy format: Numpy provides the ability to save tensors as .npy files using numpy.save(). This format preserves the complete array information, including shape, dtype, and data.
- HDF5: The Hierarchical Data Format (HDF5) is a widely used format for storing large numerical datasets. It provides flexible and efficient storage for multidimensional arrays, making it suitable for saving tensors. Python provides the h5py library for working with HDF5 files.
- Pickle: The pickle module in Python allows for object serialization, including tensors. It can save and load tensors or any other Python objects via the pickle.dump() and pickle.load() functions. However, note that pickle is not optimized for large-scale data storage and can be slower compared to other formats.
- TensorFlow's .tfrecords format: If you are working with TensorFlow, the .tfrecords format is commonly used for efficiently storing large datasets. TensorFlow provides functions to convert tensors to the tfrecords format (tf.io.TFRecordWriter).
When choosing a format, consider factors such as compatibility, data size, storage efficiency, and any requirements specific to your project.