
Best IoT Development Boards for Wearable Tech to Buy in July 2026
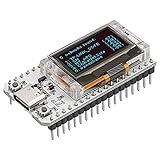
MakerFocus ESP32 OLED WiFi Kit V3 Integrated WiFi Bluetooth CP2102 IoT Development Board with 0.96-inch OLED Display for Arduino Intelligent Scenes
-
SEAMLESS ARDUINO SUPPORT: FULLY COMPATIBLE WITH ARDUINO IDE FOR EASY PROJECTS.
-
IDEAL FOR IOT: PERFECT FOR SMART CITIES, FARMS, AND HOME AUTOMATION.
-
CONVENIENT POWER SOLUTIONS: CHARGE VIA SH1.25 OR TYPE-C FOR FLEXIBILITY.


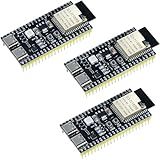
Hosyond 3Pack ESP32-S3 Development Board N16R8 MCU with Dual-Mode Wi-Fi Bluetooth Type-C, Compatible with Arduino IoT ESP32-S3-WROOM-1
- DUAL-CORE POWER: 240 MHZ PROCESSING WITH 16MB FLASH FOR STABILITY.
- USER-FRIENDLY SETUP: DUAL USB-C PORTS SIMPLIFY PROGRAMMING & DEBUGGING.
- SEAMLESS CONNECTIVITY: WI-FI & BLUETOOTH 5.0 FOR VERSATILE IOT PROJECTS.
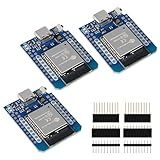
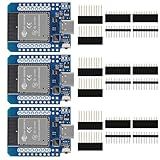
Type-C D1 Mini NodeMCU ESP32 ESP-WROOM-32 WLAN WiFi Bluetooth IoT Development Board 5V Compatible for Arduino (3pcs Type-C)
- ULTRA-LOW POWER TECH FOR EFFICIENT PERFORMANCE IN DIVERSE APPLICATIONS.
- 100% COMPATIBLE WITH ARDUINO IDE, LUA, AND MICROPYTHON FOR VERSATILITY.
- ENHANCED GPIO, BLUETOOTH, AND FAST WLAN FOR A WIDE RANGE OF PROJECTS.
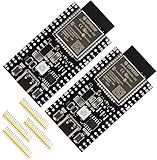
SDATEKIT 2Pcs ESP32-WROOM-32E Module USB-C 4MB ESP32-DevKitC-32E Development Board for IoT Smart Home/Industrial Control, Dual-Core 240MHz Wi-Fi Bluetooth 5.0 with USB-C, Original (Arduino/Python/IDF)
-
FUTURE-READY SUPPORT: CERTIFIED ESP32 FOR FULL COMPATIBILITY & FIRMWARE UPDATES.
-
POWERFUL PROCESSING: 240MHZ DUAL-CORE SPEEDS FOR FASTER IOT & SENSOR TASKS.
-
EASY DEV SETUP: USB-C PLUG & PLAY WITH SUPPORT FOR MULTIPLE IDES.
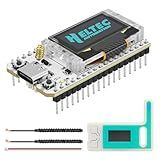
MakerFocus ESP32 LoRa V3 Development Board with Protective Case and 915MHz Antenna, Integrated WiFi Bluetooth SX1262 CP2102 0.96-inch OLED Display Type C for Meshtastic IoT Arduino Intelligent Scene
- SEAMLESS ARDUINO INTEGRATION: EASILY CONNECT WITH ANY LORAWAN GATEWAY.
- VERSATILE APPLICATIONS: PERFECT FOR SMART CITIES, IOT, AND INDUSTRIAL CONTROL.
- COMPREHENSIVE CONNECTIVITY: WIFI, LORA, BLUETOOTH ALL IN ONE BOARD.
AITRIP 3PCS Type C D1 Mini ESP32 ESP-WROOM-32 CP2104 WLAN WiFi+Bluetooth Internet of Things IoT Development Board for Arduino NodeMCU
- FULLY COMPATIBLE WITH ARDUINO IDE, LUA, AND MICROPYTHON.
- ULTRA-LOW POWER TECH FOR HIGH PERFORMANCE IN IOT APPLICATIONS.
- EXPANDED GPIO, FAST WLAN, AND VERSATILE BLUETOOTH FUNCTIONALITY.
When considering IoT development boards for wearable technology, it's vital to focus on factors such as size, connectivity options, power efficiency, and the availability of sensors. Boards that have gained popularity in wearable tech projects typically offer compact dimensions and low power consumption to accommodate the small and battery-operated nature of wearables. Many developers opt for boards that feature integrated wireless communication capabilities like Bluetooth or Wi-Fi, which are essential for connecting wearable devices to other gadgets or the cloud. Additionally, the presence of onboard sensors or compatibility with a wide range of external sensors is crucial for implementing functionalities such as health monitoring, fitness tracking, or environmental sensing. Furthermore, ease of programming and a strong developer community can significantly enhance the development process, providing better support and more extensive libraries to streamline the creation of applications.
What is the best IoT board for fitness trackers?
Choosing the best IoT board for fitness trackers depends on a range of factors including processing power, connectivity, battery efficiency, size, and support for sensors. Some popular choices that are well-suited for developing fitness trackers include:
- Nordic Semiconductor nRF52 Series: Key Features: Offers low power consumption, Bluetooth Low Energy connectivity, and a built-in ARM Cortex-M4 processor. It's known for its long battery life which is crucial for wearable devices. Pros: Excellent for Bluetooth connectivity, efficient power usage, supports various sensors.
- Espressif Systems ESP32: Key Features: Comes with integrated Wi-Fi and dual-mode Bluetooth, as well as a dual-core processor. Pros: Versatile connectivity options with Wi-Fi and Bluetooth; cost-effective. Cons: Higher power usage compared to boards designed specifically for wearables.
- Ambiq Apollo Series: Key Features: These microcontrollers are designed for ultra-low power applications and include Bluetooth connectivity options. Pros: Optimal for battery-powered applications due to extremely low power consumption.
- Texas Instruments CC2640/CC2650: Key Features: Offers low-power operation with Bluetooth Low Energy support and a variety of I/O options. Pros: Designed with wearables in mind, providing extended battery life and robust wireless communication.
- Microchip SAM L21: Key Features: Known for very low power operation with an ARM Cortex-M0+ processor. Pros: Supports low-power operation modes; good for always-on applications like fitness trackers.
Ultimately, the best choice will depend on the specific requirements of your fitness tracker project, such as the types of sensors you need to interface with, the expected battery life, and any specific connectivity features. It's also important to consider the development environment and available libraries for each platform to ensure ease of development.
How to connect sensors to IoT boards for wearables?
Connecting sensors to IoT boards for wearables involves several steps and considerations to ensure the system functions efficiently and effectively. Here’s a generalized guide to help you with the process:
1. Select the Right Components
- Sensors: Determine the type of sensors needed, such as accelerometers, gyroscopes, heart rate sensors, temperature sensors, etc., based on the application of the wearable.
- IoT Board: Choose a board with appropriate processing power, size, and connectivity options (e.g., Bluetooth, Wi-Fi) that fits the wearable design. Popular choices include Arduino Nano, ESP32, Raspberry Pi Pico, etc.
2. Understand Sensor and Board Specifications
- Pin Configuration: Check each sensor’s documentation for pin assignments (e.g., VCC, GND, SCL, SDA for I2C communication).
- Voltage and Current Requirements: Ensure the board can supply the appropriate voltage and current to the sensors.
- Communication Protocols: Determine if the sensors communicate via I2C, SPI, or analog signals, and ensure the board supports these protocols.
3. Design the Circuit
- Connection Schematics: Draw a schematic for connecting the sensors to the IoT board, clearly marking connections for power, ground, and data lines.
- Breadboard Testing: Assemble the circuit on a breadboard to ensure proper connections and function before final soldering or prototyping.
4. Programming the IoT Board
- Select the Platform: Use a platform or IDE compatible with your IoT board (e.g., Arduino IDE, PlatformIO).
- Sensor Libraries: Find and include libraries specific to your sensors, which facilitate easier integration by providing pre-written functions to read sensor data.
- Write Code: Write a sketch to initialize sensors, read data, and send or display it through your preferred method (e.g., display module, smartphone app).
5. Power Management
- Battery Selection: Choose a suitable battery that provides enough power for the desired operational time without frequent recharging.
- Power Optimization: Implement power-saving techniques in the code, such as sleep modes when the device is not actively in use.
6. Prototyping and Testing
- Prototype Assembly: Once connections and code are verified on a breadboard, create a more permanent setup using a prototype board or custom PCB.
- Testing: Test the wearable in real-world conditions to ensure sensors and the IoT system work as expected. Check for sensor accuracy, response time, and reliability in data transfer.
7. Refinement and Enclosure Design
- Adjust as Necessary: Modify the circuit and code based on real-world performance to resolve any issues.
- Design Enclosure: Design and prototype a wearable enclosure that fits all components while maintaining comfort, functionality, and durability.
8. Connectivity and Data Integration
- Connectivity Setup: Ensure robust connectivity for data transfer (e.g., pairing Bluetooth with a smartphone app or sending data to a cloud server via Wi-Fi).
- Data Handling: Implement algorithms or services to process, store, and/or visualize the collected data for meaningful insights.
Additional Tips:
- Check Compatibility: Always double-check compatibility between sensors and the IoT board before purchase.
- Iterative Testing: Continuously test and iterate to refine sensor accuracy and connection stability.
- Documentation: Keep thorough documentation of connections and code for maintenance and upgrades.
This guide should equip you with a sturdy foundational approach to integrating sensors into IoT boards for wearable devices.
How to update firmware on IoT wearable tech?
Updating firmware on IoT wearable tech devices can vary depending on the specific device and manufacturer, but typically, the process involves the following general steps. Always refer to the device's official documentation for precise instructions:
- Check Compatibility and Requirements: Ensure your wearable device is compatible with the new firmware version. Make sure the device is fully charged or connected to a power source.
- Install the Companion App: Download and install any companion app associated with the wearable tech from the app store on your smartphone (iOS/Android).
- Connect the Device: Pair your wearable device with your smartphone via Bluetooth. Follow the prompts in the companion app to establish a connection if it's not already connected.
- Backup Data: If possible, back up any important data from the device through the app. Firmware updates can sometimes reset device data.
- Check for Firmware Updates: Open the companion app and navigate to the settings or device info section. Look for an option like "Firmware Update," "Device Update," or similar.
- Download and Install the Update: If an update is available, follow the on-screen instructions to download and install it. Ensure the device stays connected to your phone and remains within range during the update process.
- Complete the Installation: Wait for the update to complete. This process can take several minutes. The device may restart automatically once the update is complete.
- Verify the Update: Check the firmware version in the app to confirm that it matches the latest version provided by the manufacturer.
- Troubleshooting: If the update fails, restart both the wearable device and your smartphone, and try again. Consult the manufacturer's support resources if you encounter issues.
- Regular Checks: Periodically check for firmware updates to keep your device secure and functioning optimally.
By following these steps, you can ensure that your IoT wearable tech is always up-to-date with the latest features and security enhancements.