Best XML Java Tools to Buy in January 2026

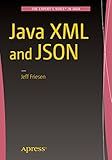
Java XML and JSON


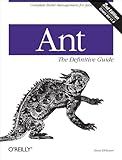
Ant: The Definitive Guide, 2nd Edition
- AFFORDABLE PRICES: SAVE MONEY WITH OUR QUALITY USED BOOKS.
- QUALITY ASSURANCE: CAREFULLY VETTED FOR GOOD CONDITION & READABILITY.
- ECO-FRIENDLY CHOICE: REDUCE WASTE BY CHOOSING USED OVER NEW BOOKS.


Professional XML Development with Apache Tools: Xerces, Xalan, FOP, Cocoon, Axis, Xindice


Eclipse
- AFFORDABLE PRICES FOR QUALITY USED BOOKS IN GOOD CONDITION.
- ECO-FRIENDLY CHOICE: REDUCE WASTE BY BUYING USED BOOKS TODAY!
- UNIQUE FINDS: DISCOVER HIDDEN GEMS AND RARE TITLES AT GREAT DEALS!


Java Message Service: Creating Distributed Enterprise Applications


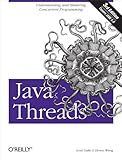
Java Threads: Understanding and Mastering Concurrent Programming


Writing Compilers and Interpreters: A Software Engineering Approach


To build XML in Java, you can use the DOM (Document Object Model) API, which provides a way to create, modify, and traverse XML documents.
- Import the necessary classes: import javax.xml.parsers.DocumentBuilderFactory; import javax.xml.parsers.DocumentBuilder; import org.w3c.dom.Document; import org.w3c.dom.Element;
- Create a new XML document: DocumentBuilderFactory factory = DocumentBuilderFactory.newInstance(); DocumentBuilder builder = factory.newDocumentBuilder(); Document document = builder.newDocument();
- Create the root element: Element rootElement = document.createElement("root"); document.appendChild(rootElement);
- Create child elements and add them to the root element: Element childElement = document.createElement("child"); rootElement.appendChild(childElement);
- Set attributes on elements: childElement.setAttribute("attribute", "value");
- Add text content to an element: childElement.setTextContent("Some text");
- Create additional elements and modify the XML structure as needed.
- Finally, save the XML document to a file or use it according to your requirements: // Output to console TransformerFactory transformerFactory = TransformerFactory.newInstance(); Transformer transformer = transformerFactory.newTransformer(); DOMSource source = new DOMSource(document); StreamResult result = new StreamResult(System.out); transformer.transform(source, result);
Remember to handle any potential exceptions that may occur during the XML creation process.
Note: Another popular approach for creating XML is using libraries like JAXB (Java Architecture for XML Binding) or XStream, which simplify the process and provide annotations to map Java objects to XML elements.
How to remove a specific element from XML in Java?
To remove a specific element from an XML file in Java, you can use the DOM (Document Object Model) API. Here's an example:
- Load the XML file into a Document object:
File xmlFile = new File("path/to/your/xml/file.xml"); DocumentBuilderFactory factory = DocumentBuilderFactory.newInstance(); DocumentBuilder builder = factory.newDocumentBuilder(); Document document = builder.parse(xmlFile);
- Identify the element you want to remove. You can use various methods depending on how you want to locate the element. For example, if you know the element's tag name is "elementToRemove":
Element elementToRemove = (Element) document.getElementsByTagName("elementToRemove").item(0);
- Remove the element from its parent node:
Node parentNode = elementToRemove.getParentNode(); parentNode.removeChild(elementToRemove);
- Optional: Write the modified document back to the XML file:
TransformerFactory transformerFactory = TransformerFactory.newInstance(); Transformer transformer = transformerFactory.newTransformer(); transformer.setOutputProperty(OutputKeys.INDENT, "yes");
// Write to the original XML file DOMSource source = new DOMSource(document); StreamResult result = new StreamResult(xmlFile); transformer.transform(source, result);
Note: This code assumes you have imported the necessary classes:
import java.io.File; import javax.xml.parsers.DocumentBuilder; import javax.xml.parsers.DocumentBuilderFactory; import javax.xml.transform.Transformer; import javax.xml.transform.TransformerFactory; import javax.xml.transform.dom.DOMSource; import javax.xml.transform.stream.StreamResult; import org.w3c.dom.Document; import org.w3c.dom.Element; import org.w3c.dom.Node; import org.w3c.dom.NodeList; import javax.xml.transform.OutputKeys;
Remember to handle exceptions and make sure to close any resources appropriately.
How to read an XML file in Java?
To read an XML file in Java, you can use the following steps:
- Import the necessary classes:
import javax.xml.parsers.DocumentBuilderFactory; import javax.xml.parsers.DocumentBuilder; import org.w3c.dom.Document; import org.w3c.dom.NodeList; import org.w3c.dom.Node; import org.w3c.dom.Element;
- Create a method to read the XML file:
public void readXMLFile(String filePath) { try { // Create a DocumentBuilderFactory DocumentBuilderFactory dbFactory = DocumentBuilderFactory.newInstance();
  // Create a DocumentBuilder
  DocumentBuilder dBuilder = dbFactory.newDocumentBuilder();

  // Parse the XML file
  Document doc = dBuilder.parse(new File(filePath));

  // Normalize the XML structure
  doc.getDocumentElement().normalize();

  // Get the root element
  Element root = doc.getDocumentElement();

  // Process child nodes of the root element
  NodeList nodeList = root.getChildNodes();
  for (int i = 0; i < nodeList.getLength(); i++) {
     Node node = nodeList.item(i);
     if (node.getNodeType() == Node.ELEMENT\_NODE) {
        Element element = (Element) node;
        // Process the XML elements here
        System.out.println("Element Name: " + element.getNodeName());
        System.out.println("Element Value: " + element.getTextContent());
     }
  }
} catch (Exception e) { e.printStackTrace(); } }
- Call the method with the path to your XML file:
readXMLFile("path/to/your/file.xml");
This code uses the DocumentBuilder class from the javax.xml.parsers package to parse the XML file. The DocumentBuilderFactory class is used to create the DocumentBuilder instance. Once the XML file is parsed, you can traverse the XML structure and process the elements as needed.
What is XML parsing using SAX in Java?
XML parsing using SAX (Simple API for XML) in Java is a mechanism to extract data from an XML document by reading it sequentially and processing individual elements in a methodical manner. SAX parser is an event-based parser, which means it reads the XML document sequentially and triggers events at specific points such as encountering the start or end of an element.
The process involves creating a handler class that extends the DefaultHandler class provided by the SAX API. This handler class defines callback methods that are invoked when specific events occur during parsing. These methods include startElement(), endElement(), characters(), and others.
To parse an XML document using SAX, the following steps are typically followed:
- Create a SAX parser instance.
- Create an instance of the handler class that extends DefaultHandler.
- Configure the parser with the appropriate features and properties.
- Set the handler as the content handler for the parser.
- Provide the XML document to be parsed to the parser.
- The parser triggers events as it processes the XML document, and the handler's callback methods are called to handle these events.
- The handler's methods can extract and process the desired data from the XML document.
- Once parsing is complete, the parser can be closed and resources can be released.
SAX parsing is memory-efficient as it doesn't load the entire XML document into memory at once. It is suitable for large XML files or when memory usage needs to be minimized. However, it requires more code and manual handling compared to other parsing methods like DOM (Document Object Model).
How to generate XML using Java?
To generate XML using Java, you can make use of the built-in Java API for XML Processing (JAXP) library. Here's a step-by-step guide:
- Import the necessary classes:
import javax.xml.parsers.DocumentBuilderFactory; import javax.xml.parsers.DocumentBuilder; import org.w3c.dom.Document; import org.w3c.dom.Element; import org.w3c.dom.Node;
- Create a new DocumentBuilder object:
DocumentBuilderFactory dbFactory = DocumentBuilderFactory.newInstance(); DocumentBuilder dBuilder = dbFactory.newDocumentBuilder();
- Create a new Document object:
Document doc = dBuilder.newDocument();
- Create the root element:
Element rootElement = doc.createElement("root"); doc.appendChild(rootElement);
- Create child elements and add them to the root element:
Element childElement = doc.createElement("child"); rootElement.appendChild(childElement);
Element attributeName = doc.createElement("attribute"); attributeName.appendChild(doc.createTextNode("value")); childElement.appendChild(attributeName);
- Repeat step 5 to create more elements as needed.
- Convert the Document object to an XML string:
TransformerFactory transformerFactory = TransformerFactory.newInstance(); Transformer transformer = transformerFactory.newTransformer(); StringWriter writer = new StringWriter(); transformer.transform(new DOMSource(doc), new StreamResult(writer)); String xmlString = writer.getBuffer().toString();
- The xmlString now contains the generated XML.
Here's a complete example:
import javax.xml.parsers.DocumentBuilderFactory; import javax.xml.parsers.DocumentBuilder; import org.w3c.dom.Document; import org.w3c.dom.Element; import org.w3c.dom.Node; import javax.xml.transform.Transformer; import javax.xml.transform.TransformerFactory; import javax.xml.transform.dom.DOMSource; import javax.xml.transform.stream.StreamResult; import java.io.StringWriter;
public class XMLGenerator { public static void main(String[] args) { try { // Step 2: Create a DocumentBuilder DocumentBuilderFactory dbFactory = DocumentBuilderFactory.newInstance(); DocumentBuilder dBuilder = dbFactory.newDocumentBuilder();
        // Step 3: Create a Document object
        Document doc = dBuilder.newDocument();

        // Step 4: Create the root element
        Element rootElement = doc.createElement("root");
        doc.appendChild(rootElement);

        // Step 5: Create child elements and add them to the root element
        Element childElement = doc.createElement("child");
        rootElement.appendChild(childElement);

        Element attributeName = doc.createElement("attribute");
        attributeName.appendChild(doc.createTextNode("value"));
        childElement.appendChild(attributeName);

        // Step 7: Convert the Document object to XML string
        TransformerFactory transformerFactory = TransformerFactory.newInstance();
        Transformer transformer = transformerFactory.newTransformer();
        StringWriter writer = new StringWriter();
        transformer.transform(new DOMSource(doc), new StreamResult(writer));
        String xmlString = writer.getBuffer().toString();

        // Print the generated XML
        System.out.println(xmlString);
    } catch (Exception e) {
        e.printStackTrace();
    }
}
}
Note: Make sure to handle any exceptions appropriately while generating XML in your production code. This example generates the following XML:
What is XML Schema in Java?
XML Schema in Java is a mechanism that allows developers to define the structure, constraints, and data types of XML documents. It provides a way to validate XML documents against the specified schema rules and perform various operations on XML data, such as parsing, querying, and manipulating.
Java provides built-in support for XML Schema through the javax.xml.validation package. This package includes classes like Schema, Validator, ValidatorHandler, and SchemaFactory that enable developers to create, manipulate, and validate XML documents using XML Schema.
With XML Schema in Java, developers can ensure the integrity and consistency of XML data by validating it against a pre-defined schema. This helps in identifying validation errors and ensures that the XML document conforms to the specified rules. Moreover, it allows for the generation of Java classes from XML Schema, providing a convenient way to map XML data to Java objects.
Overall, XML Schema in Java plays a crucial role in handling XML data, ensuring its validity, and providing a structured approach for XML processing in Java applications.
