
Best Tools for Mixed Content Issues to Buy in July 2026

MKM Pottery Tools Stamps 4 Clay Large Square Decorative Stamp for Clay (Ssl-076 Summer Tree)
- CREATE UNIQUE CLAY PATTERNS WITH EASY-TO-USE SSL STAMPS!
- HANDCRAFTED QUALITY BY SKILLED MKM EMPLOYEES ENSURES DURABILITY.
- PERFECT SIZE (6CM X 6CM) FOR INTRICATE DESIGNS ON YOUR POTTERY.


MKM Pottery Tools "Stamps 4 Clay" Large Square Decorative Stamp for Clay (Ssl-97 Mandala)
- TRANSFORM YOUR CLAY WITH UNIQUE PATTERNS USING SSL STAMPS!
- CRAFTED BY SKILLED ARTISANS FOR SUPERIOR QUALITY AND DESIGN.
- PERFECT SIZE (6CM X 6CM) FOR PRECISE, STUNNING CLAY IMPRESSIONS!

MKM Pottery Tools "Stamps 4 Clay" Large Square Decorative Stamp for Clay (Ssl-19 Sea Turtle)
- CREATE UNIQUE PATTERNS EFFORTLESSLY WITH MKM SSL CLAY STAMPS.
- HANDCRAFTED QUALITY FROM SKILLED MKM ARTISANS FOR STUNNING RESULTS.
- PERFECT SIZE (6CM X 6CM) FOR VERSATILE USE IN ALL YOUR CLAY PROJECTS.
Evaluation of Some SMTP Testing, Email Verification, Header Analysis, SSL Checkers, Email Delivery, Email Forwarding and WordPress Email Tools
Tajima AZ-SSL S-Long Shackle
- COMPACT TOOL MOUNTING WIDTH: JUST 0.3 INCH FOR VERSATILE USE.
- DURABLE ZINC DIE-CAST MATERIAL ENSURES LONG-LASTING PERFORMANCE.
- LIGHTWEIGHT AT 0.4 OZ; FEATURES HANDY LOOSENING MECHANISM INCLUDED.
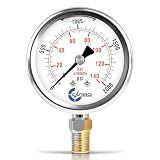
CARBO Instruments 2000 PSI Glycerin Liquid Filled Pressure Gauge, 2.5" Dial, 1/4 NPT Lower Mount, 304 Stainless Steel Case, Brass Wetted Parts, Dual Scale PSI/Bar - ASME B40.1 Grade A
- PRECISION ACCURACY: ASME B40.1 GRADE A ENSURES RELIABLE READINGS.
- STABLE & RELIABLE: LIQUID-FILLED FOR ACCURATE, FLUTTER-FREE MEASUREMENTS.
- VERSATILE USE: PERFECT FOR AIR, OIL, WATER, GAS, AND MACHINERY SYSTEMS.

Stonestreet Premium Natural Import Vegetable Veg Tan Tooling Stamping Carving Full Grain Cowhide Leather Strips Belt Blanks Straps 48" - 52" Length (3" 8-9 oz / 3.2-3.6mm)
- PREMIUM 8-9 OZ VEGETABLE TANNED LEATHER FOR DURABLE CREATIONS.
- IDEAL FOR TOOLING, CARVING, AND CUSTOMIZING UNIQUE LEATHER GOODS.
- VERSATILE USE: BELTS, HOLSTERS, AND CREATIVE PROJECTS LIKE PYROGRAPHY.
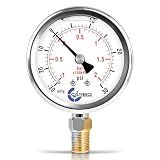
CARBO Instruments Compound Pressure Gauge -30 inHg to 30 PSI, Liquid Filled, 2.5" Dial, 1/4 NPT Lower Mount, 304 Stainless Steel Case, Brass Wetted Parts, PSI/inHg - ASME B40.1 Grade A
-
ASME GRADE A ACCURACY: RELIABLE PERFORMANCE WITH EASY-READING DIAL.
-
LIQUID-FILLED STABILITY: MINIMIZES VIBRATION FOR PRECISE PSI/BAR READINGS.
-
HEAVY-DUTY BUILD: RUST-RESISTANT MATERIALS ENSURE LONG-LASTING USE.
Elizabethan Classics ECSSLPB Model SSL Straight Bath Supplies, Polished Brass
- FITS TUB RIM MOUNT FAUCETS FOR EASY INSTALLATION AND USE.
- VERSATILE SIZE: 1/2-INCH OD, 29-1/2-INCH LONG, JOBSITE CUT READY.
- COMPLETE SET INCLUDES TUBES, ESCUTCHEONS, NUTS, AND WASHERS.
When a webpage is accessed using the HTTPS protocol, all its content, including text, images, scripts, and other resources, should also be served over HTTPS. However, sometimes a webpage may contain "mixed content," meaning it includes both HTTP and HTTPS resources. This can lead to mixed content issues, raising security concerns and potentially causing problems with the webpage's functionality.
To handle mixed content issues in HTTPS, consider the following:
- Identify mixed content: Use the browser's developer tools or website auditing tools to identify HTTP resources (e.g., images, scripts, stylesheets) requested by an HTTPS webpage.
- Update resource URLs: Ensure that all resource URLs within the page source code are specified using HTTPS. Modify any HTTP resource URLs to use HTTPS instead.
- Use relative URLs or protocol-relative URLs: Prefer relative URLs (e.g., /images/image.jpg) or protocol-relative URLs (e.g., //example.com/resource) instead of explicitly adding the HTTP or HTTPS protocol to the resource URLs. This allows the browser to request the resource over the same protocol as the webpage.
- Check embedded content: If your webpage includes embedded content such as iframes or embedded videos, ensure that those resources are also served over HTTPS. Update the embed codes or URLs accordingly.
- Update third-party content: If your webpage relies on third-party resources (e.g., external scripts, fonts), verify that they support HTTPS. Update the URLs or consider finding alternative resources that are served securely.
- Test your changes: After modifying the resource URLs, thoroughly test the webpage and make sure that all content is loaded securely without any browser warnings or errors. Test on multiple browsers and devices to ensure compatibility.
- Implement Content Security Policy (CSP): Consider using CSP to enforce security policies and prevent any mixed content from being loaded on your webpage. CSP can be configured to explicitly disallow HTTP content on an HTTPS page.
By addressing these steps, you can effectively handle mixed content issues in HTTPS, ensuring the security and integrity of your webpage and providing a seamless browsing experience for your users.
How to fix mixed content issues in HTTPS?
To fix mixed content issues in HTTPS, you can follow these steps:
- Identify the mixed content: Open your website in a browser, right-click on the page, and select "Inspect" or "Inspect Element" to open the developer tools. Look for any errors in the console indicating mixed content (e.g., "Mixed Content: The page... was loaded over HTTPS, but requested an insecure resource").
- Determine the source of mixed content: Check the URLs causing the issue. Typically, mixed content is caused by loading resources (e.g., images, scripts, stylesheets) over HTTP instead of HTTPS.
- Update HTTP links to HTTPS: Update all HTTP links to their corresponding HTTPS versions. If the resource is hosted on your own server, simply change the URL to use "https://" instead of "http://". If the resource is hosted externally, ensure that the external website supports HTTPS and update the URL accordingly.
- Use protocol-relative URLs: Instead of specifying "http://" or "https://", use protocol-relative URLs (e.g., "//example.com/resource.css"). This allows the browser to use the same protocol (HTTP/HTTPS) as the current webpage.
- Update hard-coded URLs: If you have hard-coded URLs in your website's code, update them to use HTTPS. This includes any inline JavaScript or CSS code that references external resources.
- Update plugins and third-party scripts: If you use plugins or embed third-party scripts on your website, ensure that they also load over HTTPS. If they do not, search for an updated version or an alternative that supports HTTPS.
- Check and update APIs: If your website uses APIs, verify that all API requests are done via HTTPS. Update any API endpoints or configurations as necessary.
- Test your website: After making the necessary changes, thoroughly test your website to ensure all content is being loaded securely over HTTPS. Check console errors and warnings for any remaining mixed content issues.
- Change your website's settings: If you are using a content management system (CMS) or hosting platform, review your settings to ensure they are properly configured for HTTPS. Update any settings related to site URLs, canonical URLs, or CDN configurations.
- Redirect HTTP to HTTPS: To enforce HTTPS, configure your server to redirect all HTTP requests to their HTTPS equivalents. This can be achieved by adding a redirect rule to your .htaccess file (for Apache servers) or by configuring the server settings directly.
- Monitor for future issues: Regularly check your website for mixed content issues, especially after making updates or adding new content. Automated tools and browser extensions can assist in detecting any mixed content.
By following these steps, you should be able to fix mixed content issues and ensure that your website operates securely over HTTPS.
How to update image URLs to HTTPS in a website?
To update image URLs to HTTPS in a website, you can follow these steps:
- Backup your website: Before making any changes, it is important to take a backup of your website. This ensures that in case anything goes wrong, you can revert back to the original state.
- Identify the image URLs: Find all the image URLs in your website that are currently using HTTP. This can be done by inspecting the HTML code of your web pages or by using tools like Screaming Frog SEO Spider.
- Change the image URLs: Replace all the HTTP image URLs with their corresponding HTTPS counterparts. You can do this manually or by using a search and replace tool. Make sure to update all instances of the image URLs on your website, including in HTML, CSS, and Javascript files.
- Check for mixed content warnings: After updating the image URLs, verify if there are any mixed content warnings on your website. Mixed content occurs when your page is loaded over HTTPS, but some resources (like images) are still loaded over HTTP. This can be checked in the browser's console or by using tools like DevTools in Chrome or Firefox.
- Update internal links: If you have any internal links pointing to the images on your website, update them to use the HTTPS version as well.
- Test the changes: Once you have updated all the image URLs and internal links, thoroughly test your website to ensure that everything is working correctly. Check if the images are loading properly and if there are no errors or warnings appearing on your website.
- Update image references in external sources: If you have images hosted on external sources, such as CDN or other third-party websites, make sure to update their references to use HTTPS as well.
- Update sitemaps and robots.txt: If you have generated a sitemap for your website, update it to include the new HTTPS image URLs. Additionally, update your robots.txt file to allow crawling of the HTTPS URLs.
- Redirect HTTP to HTTPS: To ensure that users are always redirected to the secure HTTPS version of your website, set up proper 301 redirects from HTTP to HTTPS. This can be done in your website's .htaccess file or through server configuration.
- Monitor for any issues: After making the HTTPS updates, monitor your website for any issues that may arise. Check for broken images, mixed content warnings, or any other anomalies that may have occurred during the transition.
By following these steps, you can successfully update image URLs to HTTPS in your website and improve the security of your web pages.
How to migrate a website from HTTP to HTTPS to avoid mixed content?
To migrate a website from HTTP to HTTPS and avoid mixed content issues, you can follow these steps:
- Obtain an SSL certificate: Purchase an SSL certificate from a reputable Certificate Authority (CA) or use a trusted free certificate provider like Let's Encrypt.
- Backup your website: Create a backup of your website files and database. This will help you revert any changes in case something goes wrong during the migration process.
- Update website URLs: Go through your website's code and database to update all URLs from HTTP to HTTPS. This includes links in HTML, CSS, JavaScript files, and database records.
- Update internal resources: Ensure that all internal resources such as images, scripts, stylesheets, etc., are loaded via HTTPS. Update the URLs of these resources accordingly.
- Update external resources: Check if you are using any external resources (e.g., third-party scripts, images, videos) that may be loaded via HTTP. Replace these with HTTPS versions or look for alternative resources that support HTTPS.
- Update CMS settings: If you are using a Content Management System (CMS) like WordPress, update the website settings to use HTTPS as the default URL. This usually involves updating the Site URL and Home URL settings in the CMS admin panel.
- Implement 301 redirects: Set up 301 redirects to redirect all HTTP traffic to HTTPS. This ensures that visitors and search engines are automatically redirected to the secure version of your website.
- Update canonical tags: Update the canonical tags on your webpages to reflect the new HTTPS URLs. This helps search engines understand that the HTTPS version is the preferred version of your website.
- Test and fix mixed content issues: After the migration, use browser developer tools or online tools to identify any remaining mixed content issues. These issues occur when some resources are still loaded via HTTP. Fix these issues by updating the URLs to use HTTPS.
- Update sitemaps and robots.txt: Update your website's sitemap and robots.txt file to include the HTTPS URLs. This helps search engines discover and index the secure version of your website.
- Monitor and maintain: Once the migration is complete, continue monitoring your website to ensure that all pages, forms, and resources are loaded securely. Set up regular SSL certificate renewals and continue monitoring for any future mixed content issues.
Remember to thoroughly test your website after each step to identify any issues and ensure a smooth migration.
What is the difference between mixed active and mixed passive content?
Mixed active content refers to a web page that contains a combination of both secure (HTTPS) and insecure (HTTP) content. This means that some elements on the page, such as images, scripts, or stylesheets, are loaded from an unsecured source. Mixed active content can compromise the security of a webpage since the unsecured content can be intercepted or modified by attackers, potentially leading to unauthorized access or data breaches.
On the other hand, mixed passive content refers to a webpage that contains both secure (HTTPS) and insecure (HTTP) content, but the insecure content does not impact the page's security. For example, if a webpage includes HTTP content that is purely informational, such as images or videos that are not interactive or script-based, it is considered as mixed passive content. While it is generally preferable to have all content on a webpage served over HTTPS for security reasons, the presence of mixed passive content may not pose a significant risk to the webpage's overall security.